
Accurately measuring bolt patterns is crucial to ensure compatibility between your vehicle and new wheels. A mismatch can lead to unsafe driving conditions or damage to your vehicle. Here’s a step-by-step guide on how to measure bolt patterns, offsets, and other critical wheel dimensions to ensure proper wheel fitment.
1. What is a Bolt Pattern?
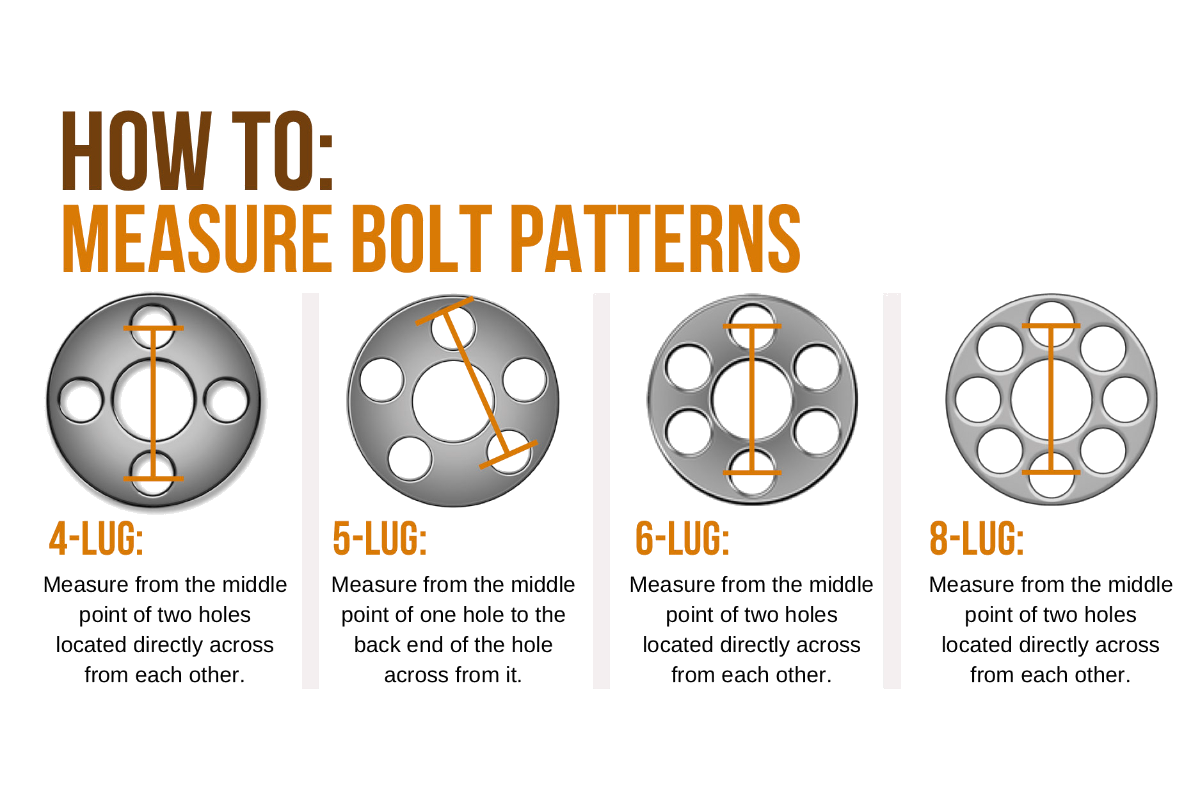
The bolt pattern (also known as the lug pattern) refers to the number of lug holes on a wheel and the diameter of the imaginary circle formed by these holes. It is typically expressed in a two-part format like 5x114.3, where the first number represents the number of bolt holes (5 in this case) and the second number represents the diameter of the circle (114.3 mm).
2. How to Measure a 4-Lug or 6-Lug Bolt Pattern
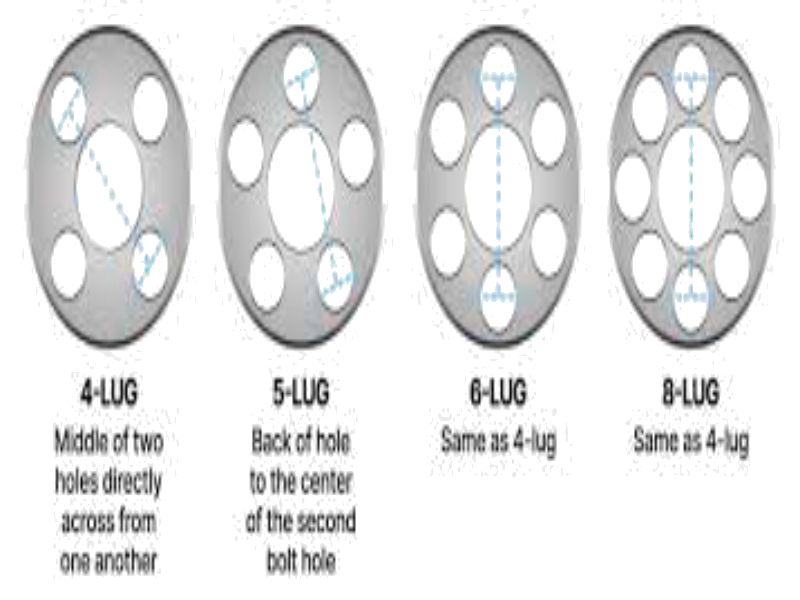
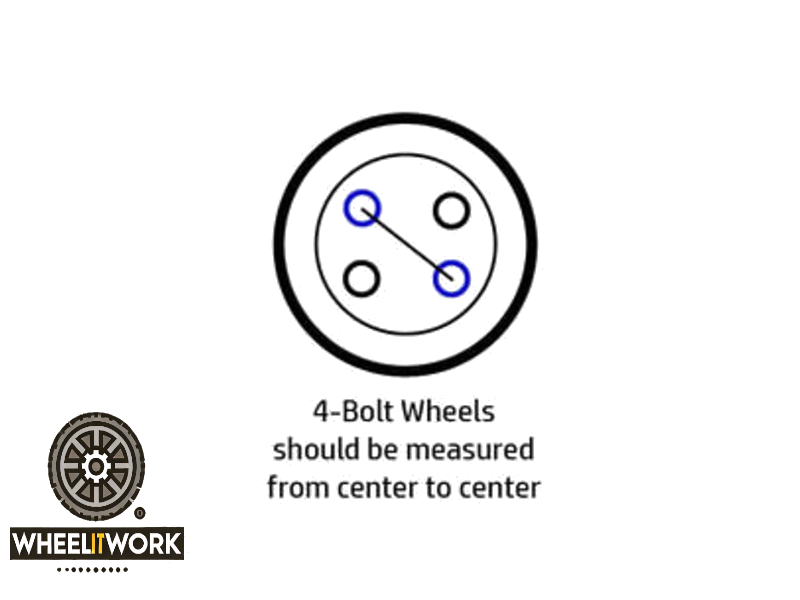
For even-numbered bolt patterns (like 4 or 6 lugs), measuring is relatively straightforward. Measure from the center of one lug hole to the center of the opposite lug hole directly across the wheel. This will give you the bolt circle diameter.
Steps for Measuring 4 or 6 Lug Bolt Patterns:
- Step 1: Use a ruler or caliper to measure the distance from the center of one lug hole to the opposite hole directly across.
- Step 2: Make sure to measure from center to center. This distance is your bolt pattern diameter.
3. How to Measure a 5-Lug Bolt Pattern
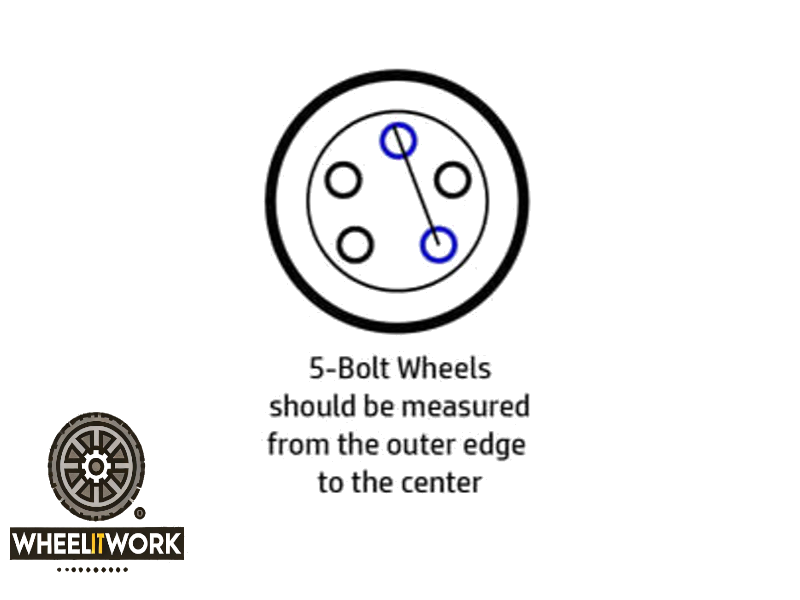
Measuring a 5-lug bolt pattern is a bit more complicated because the lugs do not line up directly across from each other. Instead, you’ll measure from the center of one lug hole to the far edge of the hole that is directly across from it.
Steps for Measuring a 5-Lug Bolt Pattern:
- Step 1: Measure from the center of one lug hole.
- Step 2: Measure to the outer edge of the hole directly across from it.
- Step 3: This measurement gives you the diameter of the bolt circle.
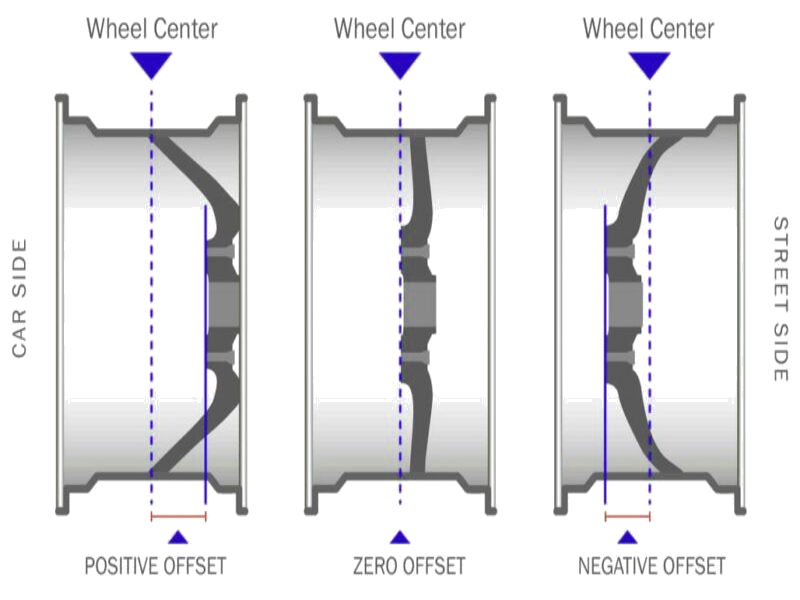
4. Measuring Wheel Offset
In addition to the bolt pattern, the wheel offset plays a crucial role in determining how your wheels fit. The offset is the distance between the wheel’s mounting surface and the centerline of the wheel. Offset is expressed as positive, negative, or zero (neutral).
- Positive Offset: The mounting surface is closer to the front (outer side) of the wheel, pushing the wheel further inside the wheel well.
- Negative Offset: The mounting surface is closer to the back (inner side) of the wheel, pushing the wheel outward.
- Zero Offset: The mounting surface aligns with the wheel’s centerline.
To measure offset:
- Step 1: Measure the wheel’s overall width.
- Step 2: Find the distance between the mounting surface and the centerline (half of the total width).
- Step 3: The difference between the two measurements is the offset.
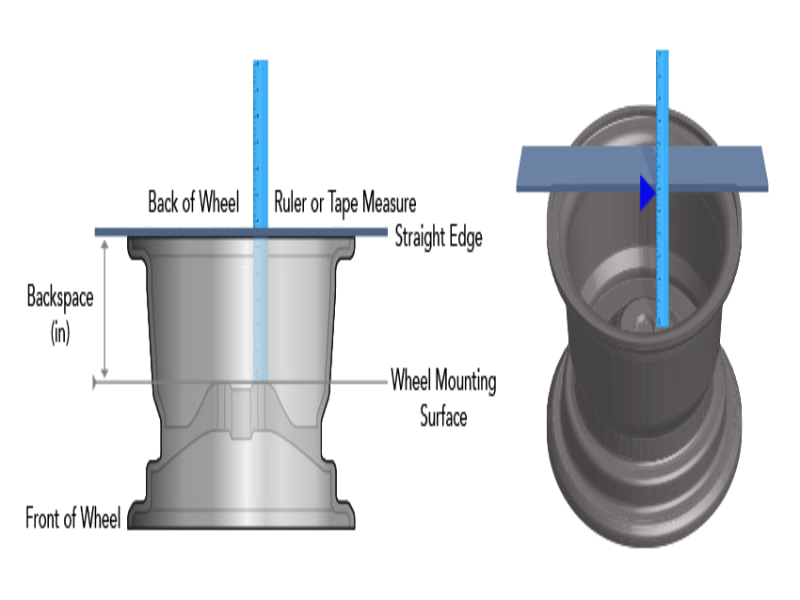
5. Measuring Backspacing
Backspacing is the distance between the back edge of the wheel and the mounting surface. It is important to measure backspacing to ensure your wheel doesn’t interfere with the vehicle’s suspension components.
Steps to Measure Backspacing:
- Step 1: Lay the wheel face down.
- Step 2: Use a straight edge across the back of the wheel.
- Step 3: Measure the distance from the straight edge to the mounting surface.
6. Ensuring Proper Fitment
After measuring bolt patterns, offset, and backspacing, compare these measurements with your vehicle’s requirements to ensure proper fitment. Most vehicles have specific bolt patterns, offsets, and backspacing guidelines to prevent issues like rubbing against suspension components or tires sticking out too far from the body.
Make sure to consult your vehicle’s manual or an expert to confirm that the wheels you’re purchasing are compatible with your vehicle’s specifications.
Conclusion
Accurately measuring bolt patterns and other wheel dimensions ensures that your new wheels will fit correctly and perform as expected. By following these steps, you can confidently select wheels that enhance your vehicle’s appearance and performance without sacrificing safety.

Comments
Log in to leave a comment.
Great guide! I always found measuring bolt patterns confusing, but the step-by-step breakdown makes it much easier to understand. The visuals are super helpful too. I’ll definitely be using these tips the next time I’m checking wheel fitment for my car. Thanks for simplifying this process!